Showing posts with label Craft. Show all posts

Friday, June 15, 2012

Plastic Safety Pin Jingles

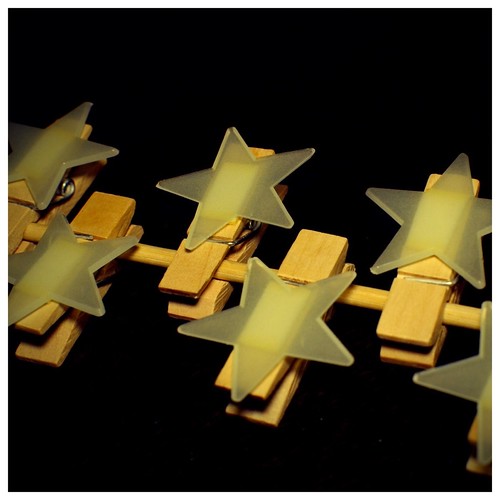
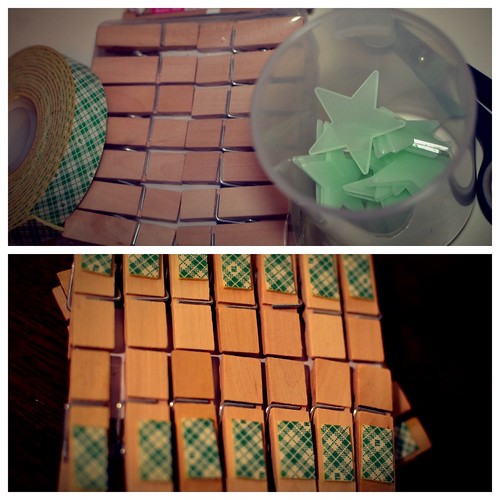
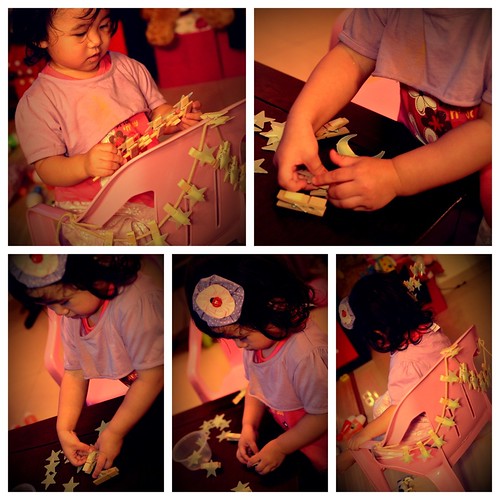
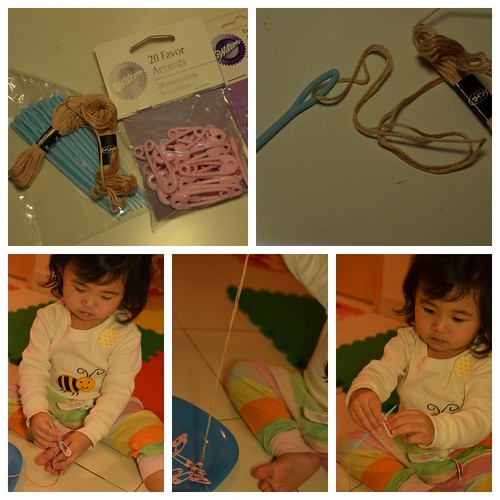
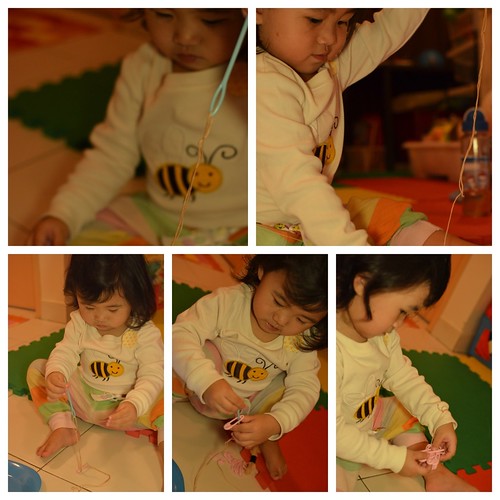
While we were in Singapore, we stumbled upon a nice art shop near the La Salle art school. Lots of fantastic stuff in there. I was so excited, looking more like a little child in a candy store more than Maya. Maya was running around being chased by daddy while mummy was busy grabbing and putting everything on the counter. Sales man, well, was happy. One of the prized item I got from there was these plastic needles. Huge ones, and much safer to be used by kids for crafting purpose, and provides endless fun with little imagination needed. And the plastic safety pins, I got them from bakery shops. There are many other types of accessories there, just pick the ones you love with hole big enough for the needle to go through. Thread a string through the needle. Do not cut the ends so that all the accessories threaded through will not fall out from the other end. :) It's a great activity for kids, and for building synapses for young minds.


Monday, June 11, 2012

Growing Crystals

We have been back for a few days now and I am nearly done with spring cleaning the house. Just a little more to go and I guess all will be back to normal. Today, finally, there's finally some sense of normalcy. It takes a little challenge to get Maya back into her usual schedule but as she gets older, it gets easier. I am very exhausted but as a full time stay-at-home mum without any maid, I get no rest. Am just waiting for the day Harry comes back so I can have a little time off to do my pedicure. That's when I get fully recharged with a magazine within an hour.

During our vacation in Singapore, I managed to stock up a few things for Maya. One of it was this crystal growing set. Took it out from the box and we had some fun. Maya was entertained, amused and very absorbed in what she had to do. She had the most fun from wearing the safety goggle and stirring the mixture. It will take some time to grow the crystal garden.

After that, we did some painting by using stamps. I let her do what she wants, explore and create. From using the stamps, she took her own paint brush, and when she got a little more curious, she used her hands. That's when she shouted ,"STICKY!" and wanted to clean up. And toddlers will be toddlers, after I cleaned her hands, she decided to take out all the wet wipes from the packet and stacked them up. It's a joy to see the amount of happiness simple things bring into the life of a little child.

Right before she went into slumberland, a little cosplay for a sweet dream tonight.


Saturday, May 26, 2012

Expressive Balloons

We decided to do a quick and fun activity a few days ago. Initially, it was supposed to be facial expressions on the balloons, which then turned into doodling on balloons. Maya kept asking daddy to blow more balloons for her. She had fun, and daddy.... well... out of breathe. :P

Saturday, May 19, 2012

Maya's Balls Collection

Like most little kids, Maya loves balls. So while I was out shopping in a new craft shop near my house, I came upon something called the Pom Pom maker by Clover. Fascinated by the many possibilities these devices can make, I bought one set. Maya and I have made a few pretty colorful Pom poms from normal wool already. Out of habit today, we stopped by our favorite shop, Daiso. Maya saw these pretty interesting yarns, grabbed a few of them and gave them to me. She said, " Make. Balls." I guess, this will be the start of Maya's humble collection of balls.


Thursday, May 17, 2012

Edible Finger Paint and Colorful Pouches

I have been really busy these past few days with cleaning and reorganizing the craft area and our walk-in wardrobe. After uncluterring the mess, and as I have promised Maya, we made edible finger paint. The ingredients are as shown in the picture above. Don't worry, this is a very simple recipe that does not require one to be a rocket scientist.
Sieve all the dry ingredients together. Mix the water into the sifted ingredients, and stir until there is no longer any lumps. To ensure that the mixture is lump free, strain the mixture through a sieve.
Cook the mixture on stove top until it has formed a gooey paste. I separated the goo into different containers and added candy oil coloring. If your child still puts things into the mouth, do use natural coloring instead. Such as, tumeric for yellow, cocoa for brown, blue peas flower for blue and spinach for green.
I took out half from each container and put them into zip lock bags, small size. Two zip lock bags per color to ensure that they won't spill. These are nice color pouches to learn about colors, for interactive dancing activities, and imitating game. Maya was having fun putting on her nose, head, tummy and etc.

As for the other half, these can be used as finger paint. But since Maya didn't like the gooey texture on her fingers, we had fun doing texture painting instead. Still lots of fun!

Monday, May 14, 2012

Paper Bag Alphabet Monster

I have to admit that this craft was unplanned but on the spot activity. It was about time for Maya to go to bed when she went to mummy's stash of craft supplies and said she wanted to make something. Tomkeep this a short and simple activity, I took out some googly eyes, sticker, paper bags and markers.
It melts my heart to see my little girl so happy and absorbed in the things she do. After she was done with the paper bag monsters, with her energy all zapped up, she's now in deep slumber. :)


Sunday, May 13, 2012

DIY Suncatcher

As promised, here is the tutorial for DIY Suncatcher. Very simple to make. :)

Items: Glass paint, transparent pp or plastic sheet, scissor, sketch pad, paint brush and pencil.

Method: Sketch on the sketch pad. Lay the pp or plastic sheet on top of your sketch. Trace the outline of the drawing with the glass paint.
Leave to dry. Once dried, cut the outline of the drawing on the pp or plastic sheet. You can punch a hole in the middle so that it can be hung with a string later.
Press out the glass paint on a palette and start painting.
Maya waited since last night to have a go at painting these. A very brief but fun activity. To prevent the sun catchers from moving around while painting, I placed wet wipes under them. The plastic sheets used are normal plastic sheets used in book binding and can be bought from stationery shops.Do try and get the thicker sheets but not too thick so that a scissor can still run through them.


Friday, May 11, 2012

Sinful Tarts Fun

Items: Tart shells, whipped cream, graham honey teddies, candied cherries, Reese peanut butter chips, stars sprinkles and cheddar cheese.

Method: Fill each tart shell with whipped cream and start decorating. :) That's how simple this activity is. A little sinful on the ingredients, but I guess if it's a once in a blue moon thing, it should be alright. Maya had lots of fun making these tarts. She was so proud of her little tarts she kept telling mummy she made them. And with her daddy's gene, she just couldn't help eating the ingredients while she was making them, especially the cheese.

Monday, May 7, 2012

Magic Counting Wand

Items: Wooden pegs, glow-in-the-dark stars, 3M double sided tape, scissors and disposable chop sticks.

Method: Cut the double sided tape into small strips and stick on one side of the wooden pegs. Stick the stars on the double sided tape. Peg the pegs onto the chopstick, and let the counting fun begins.

Some chopstick can have a star, some have three so on and so forth. And some can disappear and there you have your subtraction; and some chopsticks can add more stars, and there you have your addition. We decided to hang the additional stars on Maya's chair, and pretend it's a fairy throne. Endless fun, and they glow in the dark as well!


Sunday, May 6, 2012

Home Made Playdough

The original recipe can be found here : http://www.instructables.com/id/How-to-Make-Playdough-Play-doh/


Items needed : 2 cups flour + 1 tablespoon cream of tartar = sieve together . 2 cups warm water + 1 cup salt = mix in together and stir to dilute as much salt into the water. 2 Tablespoons vegetable oil and a non stick pan.

Mix in the sieved ingredients, salt water and vegetable oil together. After the ingredients have been thoroughly mix, sieve them to remove any lumps.

Heat up the pan and pour in the mixture. Remember to stir constantly to prevent burning. It will harden into Playdough pretty fast. Remove from pan and leave to cool. You can add in coloring if you want but I decided to leave mine plain this time so that I can mix into my original Playdough which are already partially harden. :)


Sun Catcher

Painting sun catcher is such a fun activity. These items can actually be made at home but for this round of activity, I decided to whip out the DIY set for Maya right before her bed time. These activities usually zap up her final bar of energy and then it's off for a good night slumber. When I finally gather all the materials for a home made sun catcher, I promise to post up the tutorials. :) But next up will most probably be a tutorial on home made play dough.

Wednesday, May 2, 2012

Batik Fun

Yesterday, we stopped over at our favorite book shop in Amcorp Mall, Book Xcess. Good books at affordable price. I just can't rave enough on the value for money there. While on the way back to our car, we went into an art shop. To my delight, there were many DIY kits. I am a huge fan of these items. Bought a few of them there and one of them is this Batik Painting Kit. Instead of flowers or butterflies, Maya adamantly wanted a snail. She had so much fun painting her latest craze, snail, she actually asked for another piece. I guess this only gives me more reason to buy more books in Book Xcess, while conveniently stop by the art shop for more snail Batik Painting Kit. Oh, and the ice cream at Famous Amos there rocks!

Monday, April 30, 2012

Dinosaur Forest

We finally completed our dinosaur forest. It took a few days for the papier mâché mountains to dry thoroughly. The papier mâché paste is relatively easy to make.

Cut newspaper into strips. Soak overnight and blend into paste the next day. Sieve and press out as much water as you can. Add in 1 part water and 1 part pva glue into the paste. Make sure it's not too runny or dry. Use the back of a bowl as the mould. Brush cooking oil all around it before putting on the papier mâché paste. Once done, leave aside in a well ventilated area until fully dried and harden. Remove bowl.

As for the forest, I used a large cork board as the base. You can use anything that is sturdy enough to hold the weight of the items that are put on top such as a plastic serving tray. Other than the board, the other essentials are; glue gun, assortment of fake leaves, fake grass panels, scissor, plier, disposable chopsticks and papier mâché mountains. Use glue gun to stick everything unto the cork board . To make trees, twirl the leaves around a chopstick and poke it into the center of the papier mâché mountain.

Reason why we made this; well.... as usual, I saw the prices of doll houses in the toy shop. Too frugal to buy one, and doll houses are just too main stream, with the scraps I have around the house from past projects, now we have a portable forest. Maya was so excited and helpful with this project. How I wish I could have taken pictures of he helping me out but with a hot glue gun in my hand, it was just too dangerous.

Maya loves it so much she turned it from dinosaur forest, to blocks forest, to animal forest. This is also a good way to teach your child; under, over, on, behind, in front, up and down. :)

Thursday, April 26, 2012

Teddy Bears Beans and Grain Art

We were out doing grocery shopping today and I was trying to find for a packet of peanuts with the least spoilt nuts. I just couldn't help noticing how beautiful all these colorful beans and grains look together and an idea struck me. These items will make a wonderful activity for Maya. So from grocery shopping, I rushed off to my favorite RM5 shop, Daiso, and got a few teddy bear containers. Maya named them, Maymie Bear, Papa Bear and Maya bear. Little girl was so excited and engrossed in scooping the grain and beans into the containers. When they were all done, or more to when we finally ran out of grain and beans, we put the covers back on the teddy bears. Lo and behold, Maya just made Maymie Bear and Papa Bear shakers with a little Maya Bear drum. I must admit there were some spilt beans and all, but nothing that could not be cleaned up with a good sweep. :)


Tuesday, April 24, 2012

Art of Paper Cutting

Maya is about to turn two in a few months. So I figured, it's time to introduce paper cutting to her. I used a purely plastic children craft scissors, a book that I bought with great bargain, and a plastic basket for her to put her cutouts. I couldn't take much picture as this project needed me to slip both my fingers and hers into the handle of the scissors. She was thrilled to be able to learn another new skill. When we woke up in the morning, she rushed to her stash of cutouts and proudly showed it to me.

And as she's getting older, she starts playing a bigger part in deciding activities for her. She will request to do certain activities that she fancies. As you can see here, she asked to do painting right after our paper cutting session.